filmography tool
#sw #python #film
@quasi on 10/01/24
a while ago [i] was asked to do a presentation about my professional career, this meant having to prepare a few slides ... and in it a filmography one. The thought of having to search online for all the movie posters, resizing them and create a grid was as boring as the process would have been. That's why I decided to spend twice the amount of time to build this tool [i] am about to explain :).
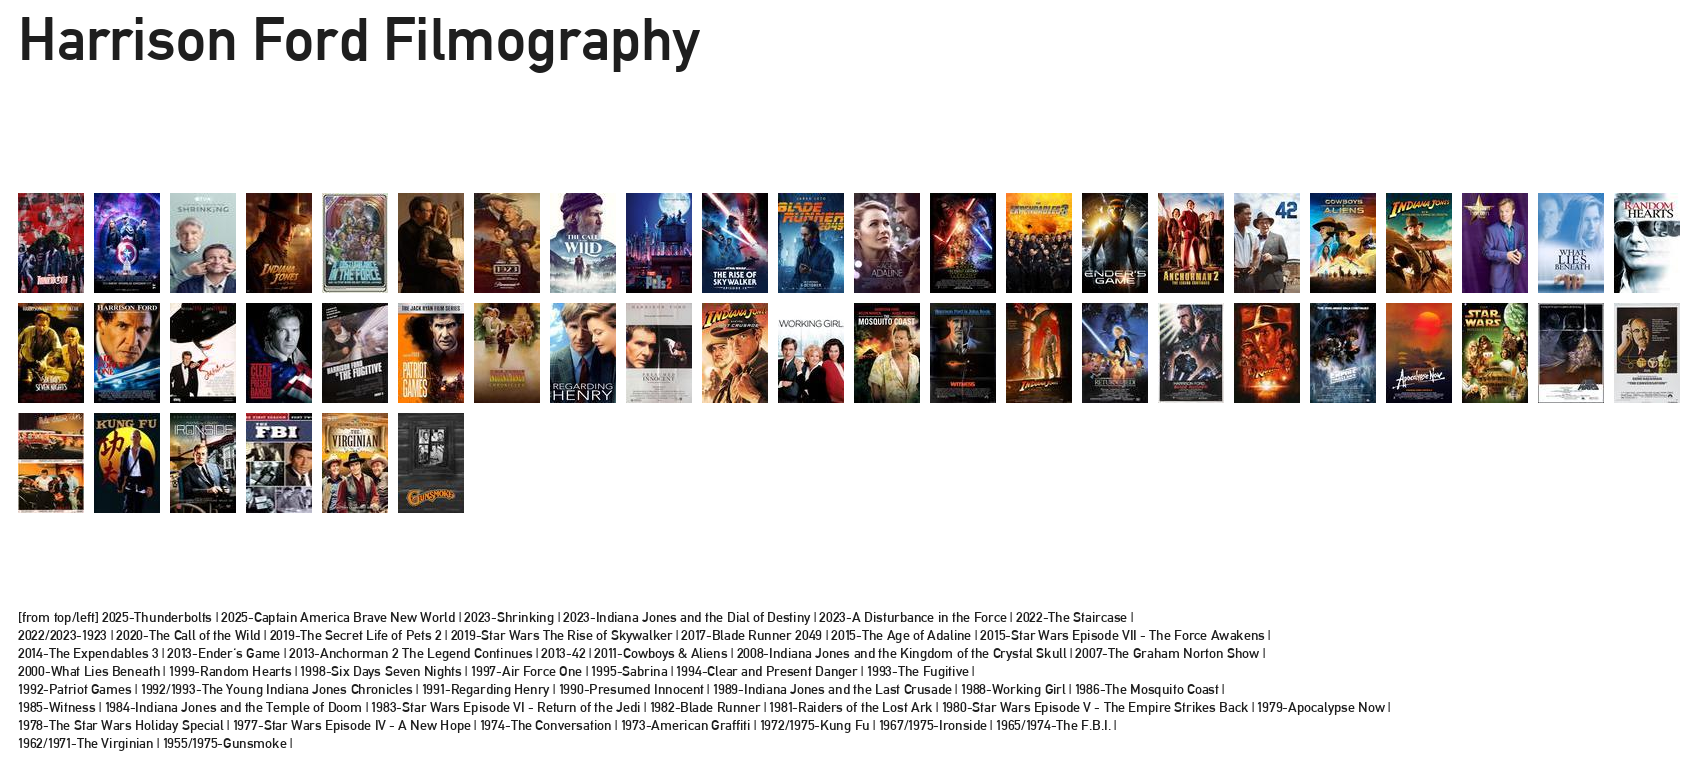
Harrison Ford 50 most popular shows in chronological order
grido is a little open source MIT licensed CLI tool with a very simple goal, search download and resize to the same height all the images found off an imdb advanced search page. This was the original goal, and also the current tool default behaviour, but a quick look at the help section will reveal that it is, in fact, way more capable then that. The tool, with a combination of flags, will allow the user to generate a complete grid.png image like shown here above. Now let's start with a guide on how to install it and how to use it.
if you're using any linux distros or macOs you're in luck as grido is built for unix-like CLIs, [i]'ve personally tested the tool on both platforms and should be working fine. If you're using Windows you might make it work under WSL but it is currently untested. Platform aside you only need to know how to open a command line in your system, and install python with your package manager of choice. If these basic prerequisites are satisfied then you can now follow the new steps.
clone the first step is to clone the repository locally on your computer, this just means you're going to copy the files needed for grido on your computer. After opening the command line choose where you would like to store the tool and cd to that location, the instruction here below will follow what [i] will do, but really it doesn't matter were you decide to place the tool.
# make a dev directory to store the tool
mkdir ~/dev
# enter the directory
cd dev
# copy the tool
git clone https://github.com/quasimontecarlo/grido.git
# enter the folder
cd grido
environment it's always a good idea to create a container when installing a new tool, this way all its dependencies won't interfere with your system. I generally use virtualenv for which [i] will provide the instructions for, but any other env/container system will work fine.
# installing virtualenv to handle our environments
python -m pip install virtualenv
# creating our grido env
python -m virtualenv grido_env
# activating the env
source grido_env/bin/activate

### Archlinux ###
sudo pacman -S python-virtualenv
virtualenv -p /usr/bin/python3 grido_env
source grido_env/bin/activate
requirements now that we have copied the repo and have set up our environment we can install all the dependencies. [i]'ve set up a simple .txt file to make this as easy as possible.
# installing dependencies
python -m pip install -r requirements.txt
learn Now that we have satisfied all the requirements we can learn how the tool works. Let's have a look at the help section of grido to start with, then we will discuss them more in depth.
python grido.py --help
'''
usage: grido [-h] [-u URL] [-o OUT] [-s SIZE] [-l] [-c] [-d] [-g] [-gs GRIDSIZE] [-gnl GRIDNEWLINE] [-b] [-ko]

this tools scrapes imdb advanced user search link, scrapes movie titles and year and searches images in duckduckgo, downloads them, and resizes them

options:
-h, --help            show this help message and exit
-u URL, --url URL     the url link to imdb, default value $IMDBURL env variable
-o OUT, --out OUT     the output location on disk where the images will be saved, default value $IMDBFOLDER env variable
-s SIZE, --size SIZE  the height size in pxls, with will be calculated respectin the original aspect, default value 200
-l, --list            if enabled provides the list of movies found
-c, --crop            if enabled crops the width to the min width of the images found
-d, --deform          if enabled deforms the width to the median width of the images found
-g, --grid            if enabled creates a new image of a grid with all the images found inside
-gs GRIDSIZE, --gridSize GRIDSIZE
                    control the grid image size, default 1920x1080, to make it work please use format $Wx$H
-gnl GRIDNEWLINE, --gridNewLine GRIDNEWLINE
                    control when the movie list text goes to a new line, the value indicates after how many items there is a new line?, the value needs to be an integer
-b, --bypass          if enabled bypass search and goes directly to the folder to resize
-ko, --keepOriginals  if enabled stores the original images in a subfolder that the script will create
'''
as previously stated the tool by default will scrape imdb advanced search page for movie titles, search for the posters on duckduckgo, download them and resize them all at the same height. Because of this it requires just two flags to work. The -u (--url) of the page it needs to scrape and the -o (--out) the folder where you want these images to be saved. If you often want to scrape the same page and want the images always in the same place you can also set up two env variables, $IMDBURL and $IMDBFOLDER, this will allow you to skip both flags as the tool will search the env variables if the flags are not provided. To customize the url you can simply click here and customize the field Cast or Crew like in the picture here below. After you have specified the person you can also further customize your search with the other fields.
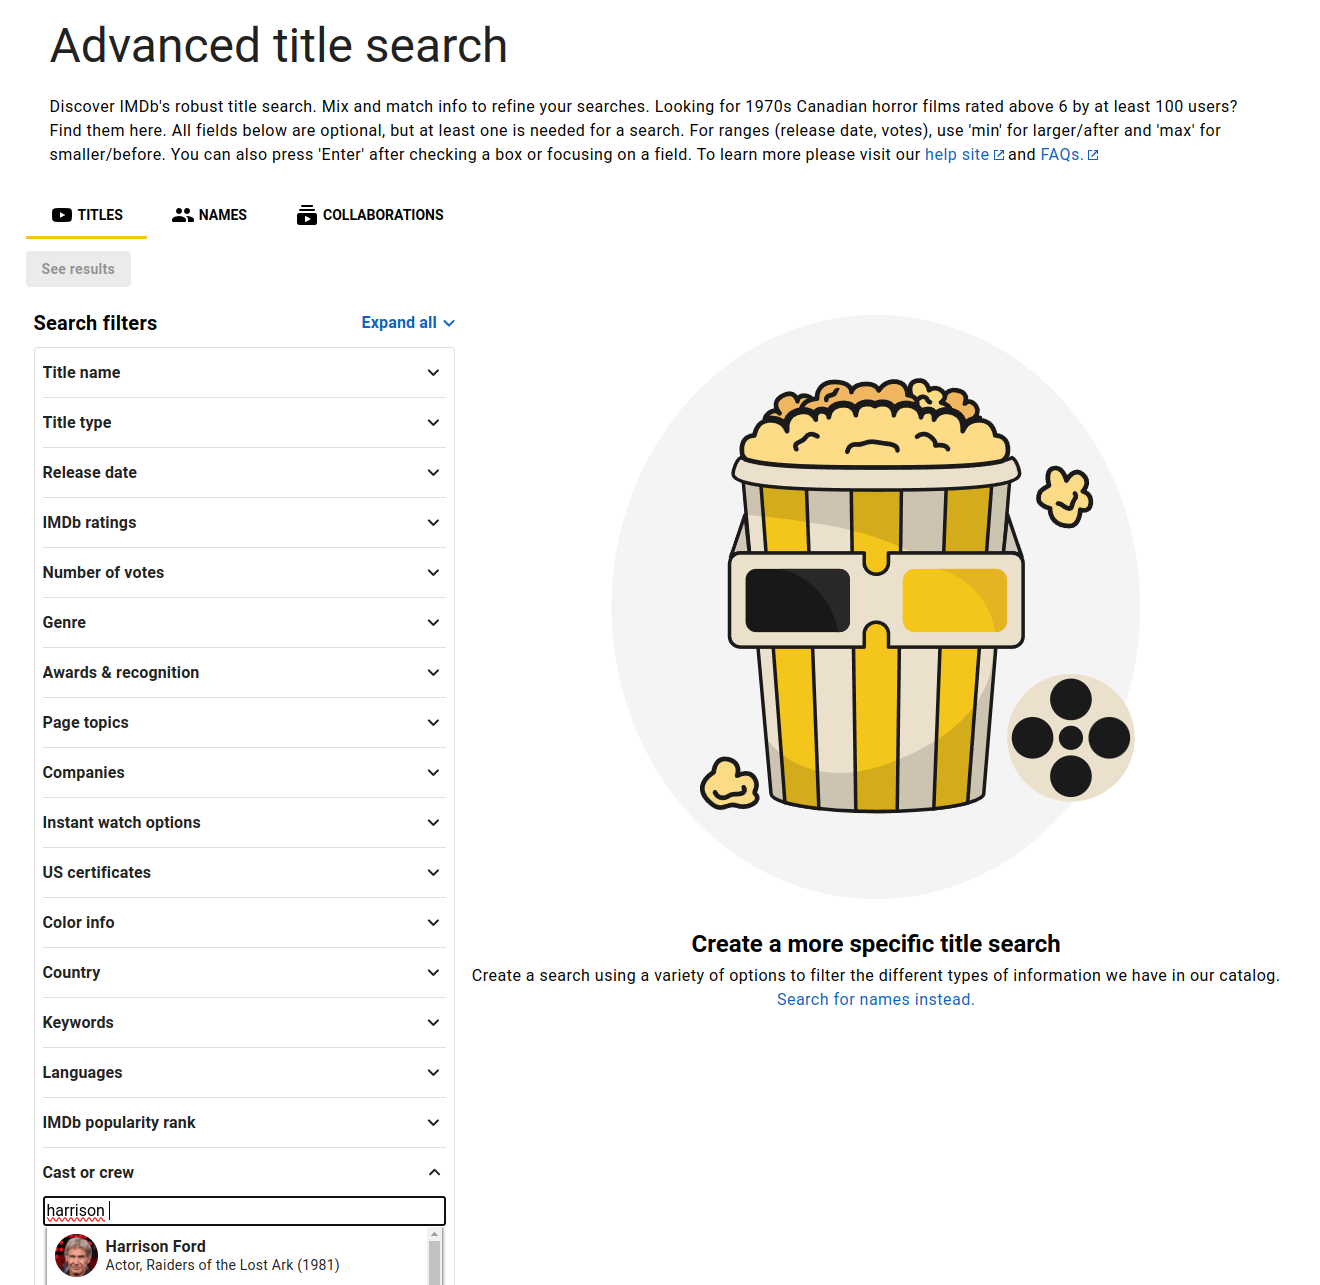
IMDB Advanced Search
once you have the link ready and chose the folder to place your downloaded images it's time to run grido.
# note it's better to wrap the url with quotes
# swap the url and folder with yours!
python grido -u "https://www.imdb.com/search/title/?role=nm0000148" -o "~/Downloads"
flags alright, we have now all our images, let's then explore a more complex usage of the tool with the help of more flags.
-s | --size :: this flags allows the user to specify the height in pixels to which all images found will be conformed to. If not provided by the user a default the value of 200px will be used. This flag is extremely important when utilized with the grid flag. Every measure is driven by this size, [i]'ll explain a little more later. But what about the width? The tool have a couple of flags to deal with it, but if not specified the width will be derived by the height and maintain the original aspect ratio of each image, this means that the tool will conform just the height of all the images found, and the width will be different between them.
-c | --crop :: the crop flag deals exactly with the width problem. [i]'ve decided to include two ways to deal with conforming the width, so the user can choose the one that prefers. The crop flag will crop both left and right side of each image to the minimum width found between all the images. This basically means that crop conforms the width of all the images to the overall min width.
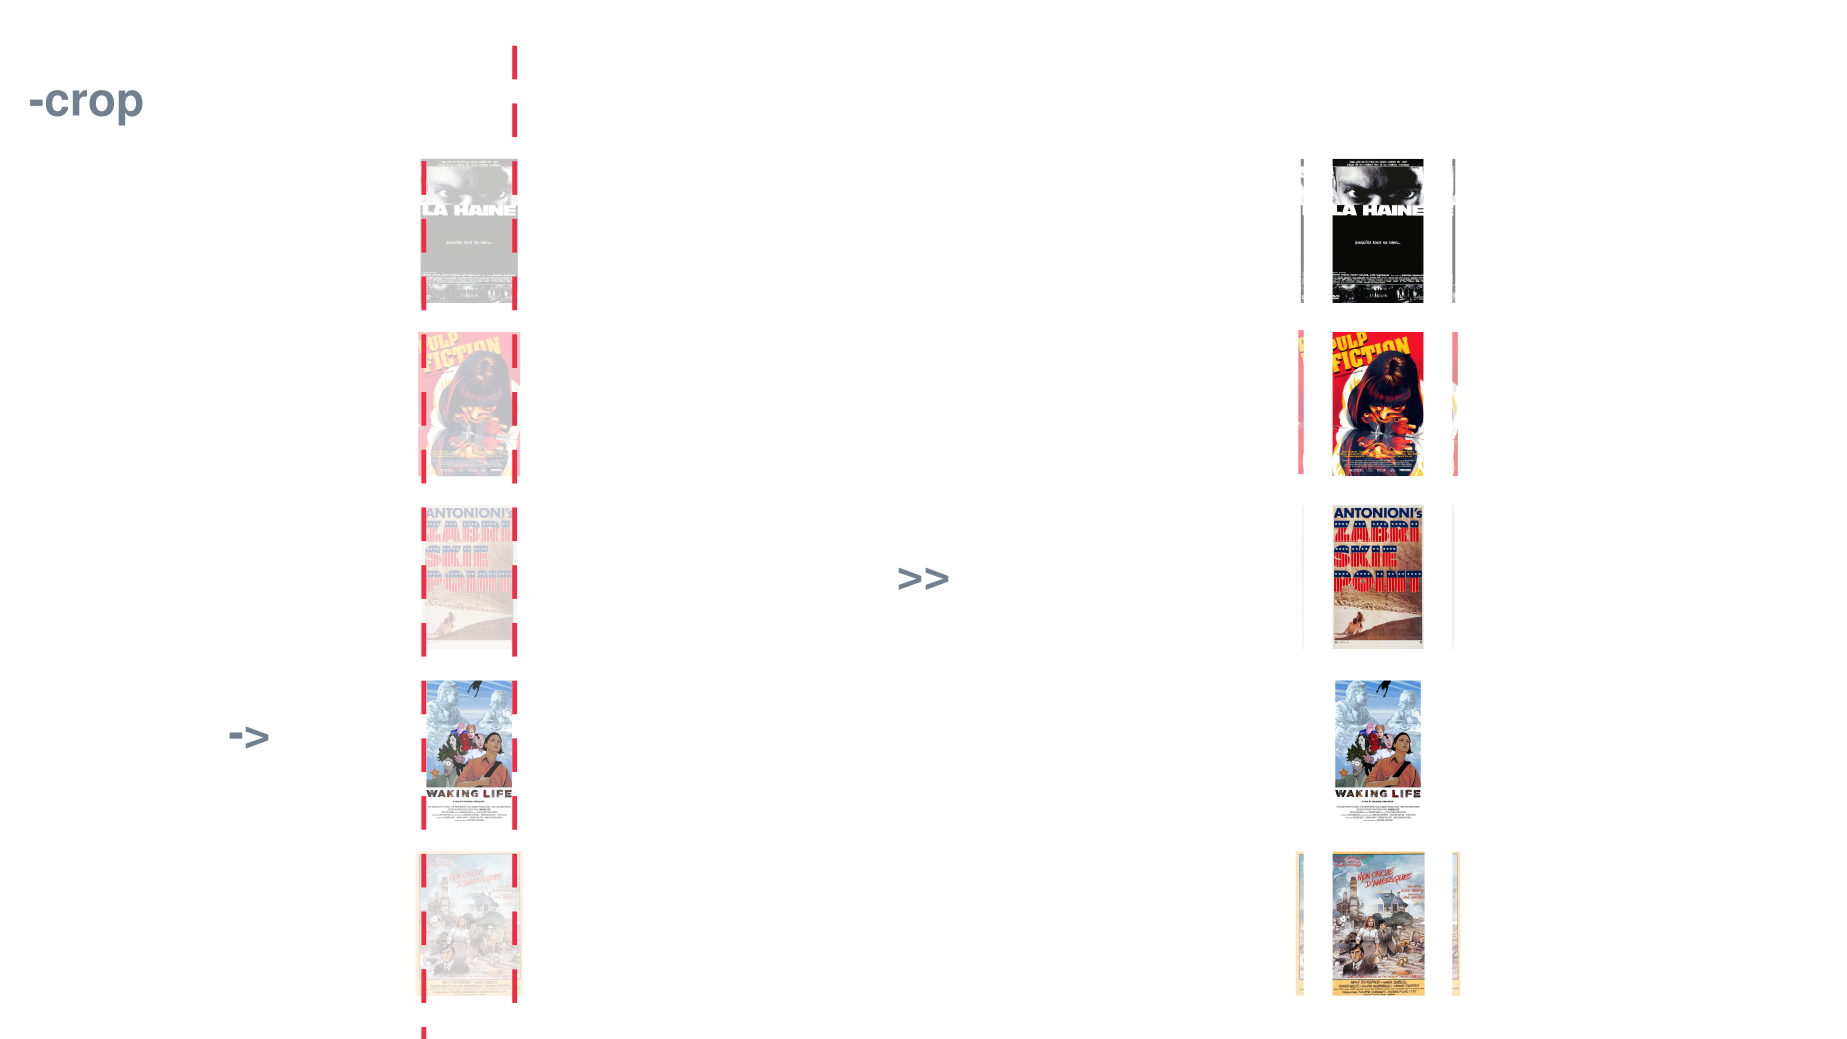
left strategy | right result
-d | --deform :: the deform flag instead doesn't cut portion of the images, but instead deforms them slightly to achieve the with conformity. One major difference between crop and deform is that instead of using the min width to deform to like crop does, it uses the median min width. This means that the deformation will be less dramatic as both the extremes will be ignored. Hopefully the picture here below will clarity any doubt on what this means.
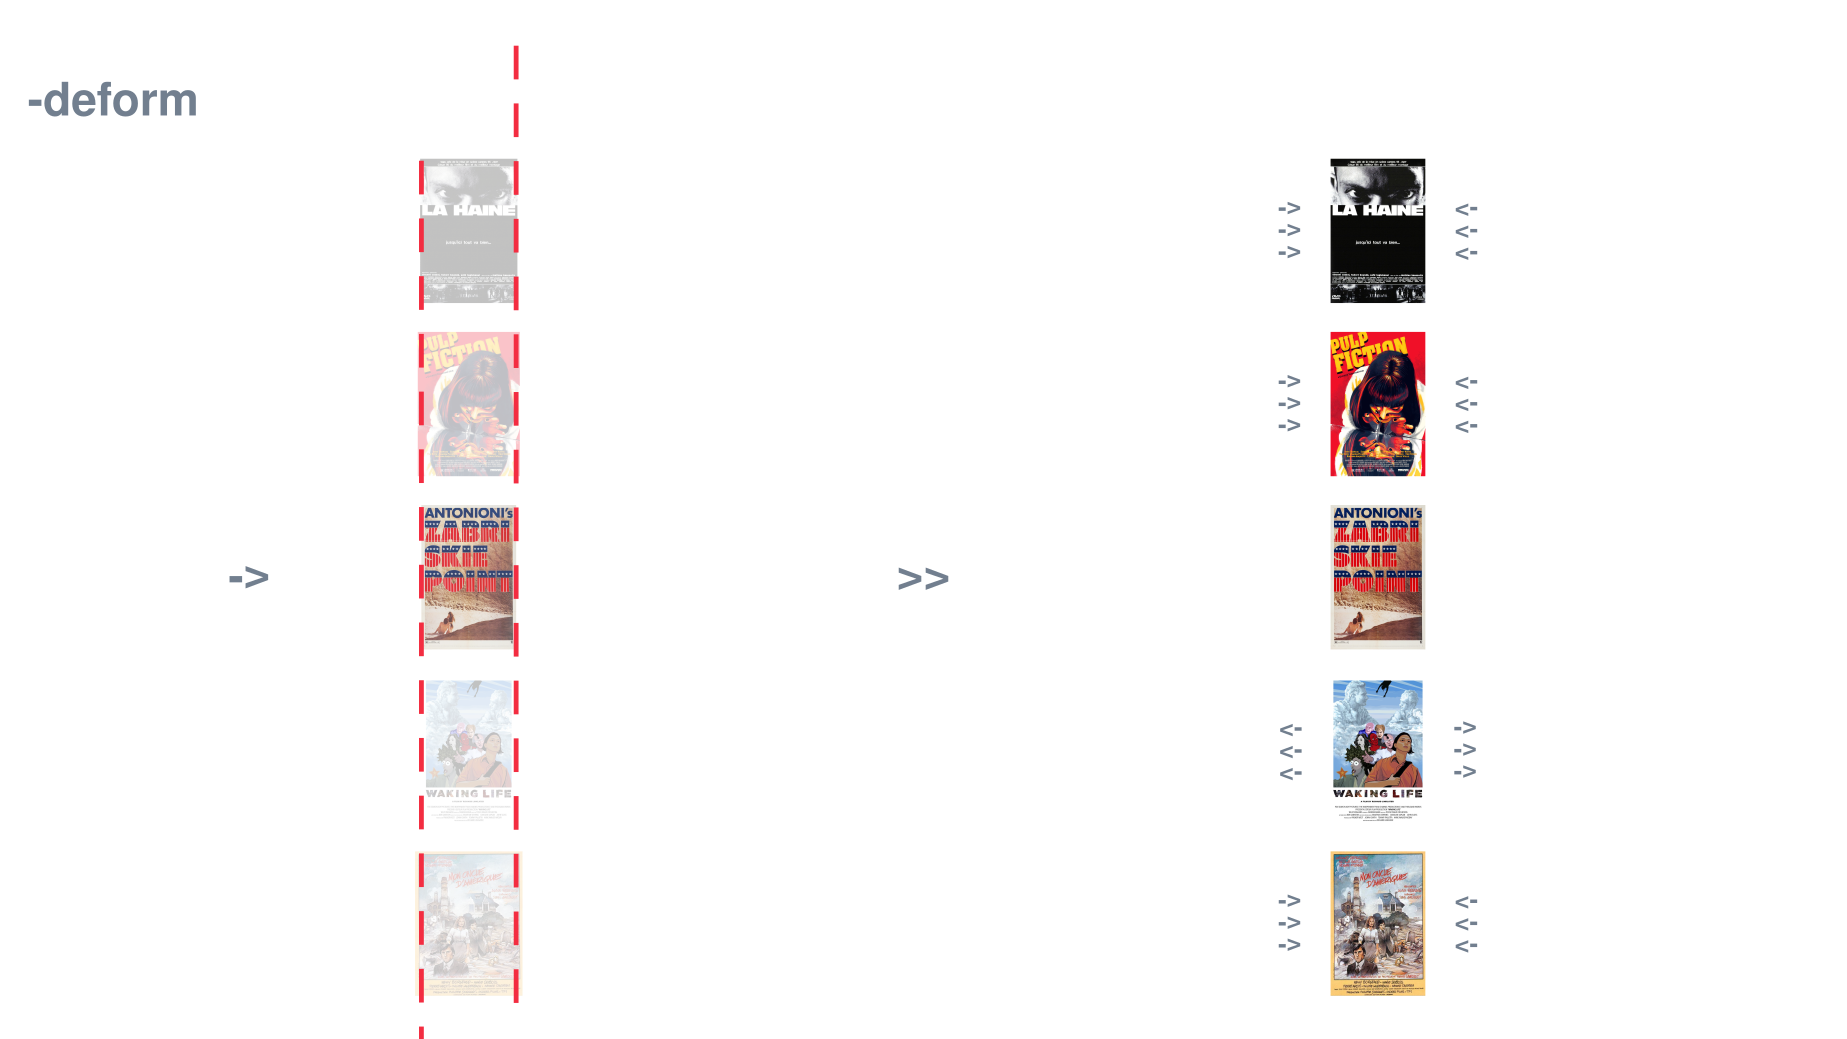
left strategy | right result
-g | --grid :: once you choose how to conform the width of the images you will be able to use the grid flag. If your goal is to get the grid.png output you must have conformed your images with either method, this is because the grid works needs perfectly conformed images to be able to output a perfect grid. The grid flag is a boolean, it just activates the option but doesn't provide control over the grid. To control it there are several flags but mostly you can play with the size flag depending on how many items there are in your grid. As a tip [i] suggest you to set the size to 200 for roughly 25 items. For 50+ items [i]'ve found that values between 100-150 work well. Higher numbers are suggested for 15 or less items. Bare in mind that the grid will stop displaying items if you're asking for more items that can be fit in the grid, so don't be afraid and play around with the size flag to find your desired result.The grid will also include a title, it will order the items found chronologically and write a list with names and dates at the bottom. To achieve this [i] am using a font included in the font folder. [i] do not hold any rights over this font and was found online here.
-gs | --gridSize :: the grid size flag controls the height and width of the grid.png allowing the user to customize to specific resolutions. If not invoked it will use a default value of 1920x1080. This flag can be used in conjunction with size to avoid shrinking the items found size and allow for more of them to fit by using a larger final resolution. The only requirements for the flag to work is for the values to be entered with this format $WIDTHx$HEIGHT like shown here above with the default value.
-gnl | --gridNewLine :: the grid new line flag controls the amount of words before a new line break for the text at the bottom of the grid. [i]'ve decided to build this control in to leave the user a little bit of creative typographic direction over the final grid file. At times this flag can result useful, especially when dealing with either very few or tons of items and very long titles. Use is as you please and please remember to input only integer values. The default value if not invoked is 7, generally values around that number will work best.
-b | --bypass :: the bypass function is a funny one as it was mainly build for me to speed up the testing process of the grid/conform flags but then opened up a door for new workflows which made it a must keep when compiling the list of flags. The idea of it is to bypass the scrape/search/download portion of the script and just act on a folder of images. Basically you will want to use this flag if you've already downloaded all the images but want to conform them further, or want a different look for the grid. This flag will also come very handy to fix some of the images the tool might find. Since it is a completely automated workflow it could happen that the user might not like a specific poster that the tool found and grid. By using the bypass flag the user will be able to substitute the unwanted image with any other one of their choice. If you will rename the swapped image like the one you're swapping from the tool will also keep the naming convention and be able to place it chronologically. In short, the bypass flag is extremely useful to have some manual input in the grid creation, but could also be used to conform a total random number of images in a folder for a completely different scope.
-l | --list :: the list flag simply prints out in the command line a list of all the items found when scraping the url provided. It is a very quick way to get a list of movies for whatever scope, [i] use it all the time to very quickly answer the questions: "How many movies have you worked on?" | "Can you tell me which movies have you worked on?". Quite handy to have.
-ko | --keepOriginals :: the keep originals flag simply creates a subfolder in the location provided where it will store all the original images found without any conformation. This is super useful in case you're playing around with the size flag and resize everything a little too small. If you keep the originals you could simply copy those back in the main folder and run the tool with the bypass flag to keep testing without having to scrape again. Very useful flag that [i] always leave on, even if [i] end up not needing the original files, having them there will speed up the process in case of problems.
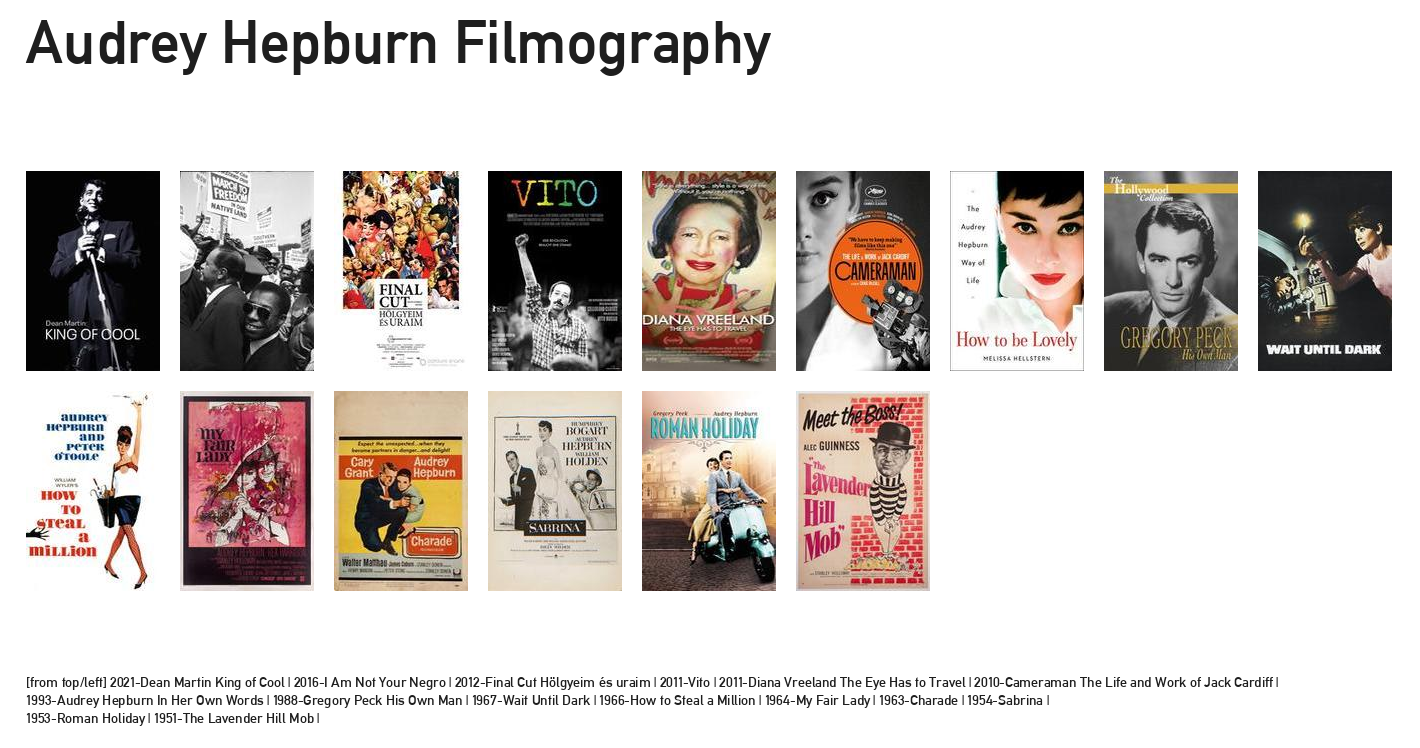
Audrey Hepburn movies with IMDB score higher then 7.5 in chronological order
examples To conclude [i]'d like to show a couple of examples to help with the flags usage, here below you can find the prompt [i]'ve used to generate the Harrison Ford image you can find at the beginning of this article and the Audrey Hepburn grid here above. Using these two examples as a base you can customize them with your url and folder and achieve your perfect grid. For any problem using the tool please open a github issue.
## Harrison ##
# because of the 50 elements the size flag is reduced
python grido -s 100 -d -g -u "https://www.imdb.com/search/title/?role=nm0000148" -o "~/Downloads"
## Audrey ##
# notice how the size flag is bigger here as we only have 14 items to grid
python grido -s 250 -d -g -u "https://www.imdb.com/search/title/?role=nm0000030&title_type=feature&user_rating=7.6," -o "~/Downloads"

# as you can see both images used the deform method
o u t